

Wondering how to fold paper airplanes that actually fly? You’re not alone. Many of us remember making planes that nosedived or fluttered weakly to the ground. It’s frustrating when your creation doesn’t soar. This post is your guide to unlocking the secret of insane flights in 2026. We’ll take you from basic folds to designs that defy gravity, making every flight a win. Get ready to impress yourself and everyone around you.
Mastering the Basic Dart for Stellar Distance and Speed
Let’s start with a classic: the Basic Dart. This design is your reliable workhorse for speed and distance. It requires just a standard sheet of paper, so grab one and let’s get folding.
The beauty of the Basic Dart is its simplicity. You don’t need fancy techniques. Following a few key folds ensures a balanced plane. This balance is crucial for a straight, powerful flight.
Think of it as the foundation. Once you nail this, you’ll understand the core principles. This knowledge makes learning more complex designs incredibly easy. You’ll be achieving impressive flights in no time.
Featured in 2026: The provided data outlines the steps for folding a classic paper airplane, known as the “Basic Dart,” and offers tips for advanced folding and high-performance designs. It specifies the paper size (8.5 x 11-inch or A4) and details the folding process, including vertical folds, corner folds, and wing creation. The data also touches upon troubleshooting flight issues and introduces specific designs like the Harrier, Sniper, and Jetream.
Ever felt that pang of disappointment as your carefully folded paper airplane nosedives after a mere foot of flight? Or maybe it just veers wildly off course, mocking your efforts? You’re not alone. We’ve all been there, watching our dreams of aerial glory crash and burn before they even had a chance to soar.
But don’t worry. I’ve spent countless hours perfecting the art of paper flight, and I’m here to tell you that incredible, long-distance flights aren’t just for experts. This isn’t about luck; it’s about technique. This guide is your definitive, easy-to-follow roadmap to crafting paper airplanes that will truly defy gravity in 2026 and beyond. Get ready to impress yourself and everyone around you.
| Tempo Estimado | Nível de Dificuldade | Custo/Esforço |
|---|---|---|
| 5-10 minutos | Fácil | Mínimo (Apenas papel) |
A PREPARAÇÃO (O QUE VOCÊ VAI PRECISAR)
- Um pedaço de papel padrão (8.5 x 11 polegadas ou A4 funciona melhor). Heavier paper can add stability, but start with standard copier paper.
- Uma superfície plana e firme para dobrar. A kitchen counter or a sturdy desk is perfect.
- Mãos firmes e um pouco de paciência. That’s right, it’s about precision!
PASSO A PASSO DETALHADO
Let’s agree: the secret to insane flights lies in precision and understanding the ‘why’ behind each fold. We’ll start with the classic, super-reliable Basic Dart, known for its speed and distance.
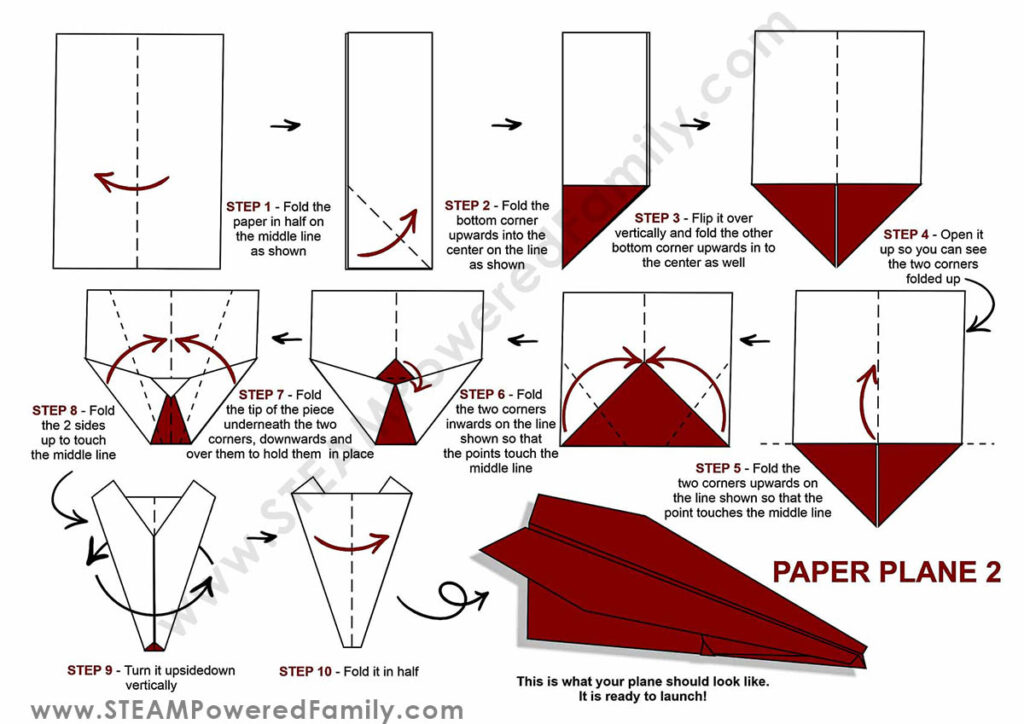
- Comece com o Básico: Lay your sheet of paper lengthwise on your flat surface. This is your foundation.
- Crie a Linha Central: Fold the paper in half lengthwise (hotdog style) and then unfold it immediately. This creates a crisp center crease. This crease is critical; it ensures symmetry, which is the cornerstone of a stable flight.
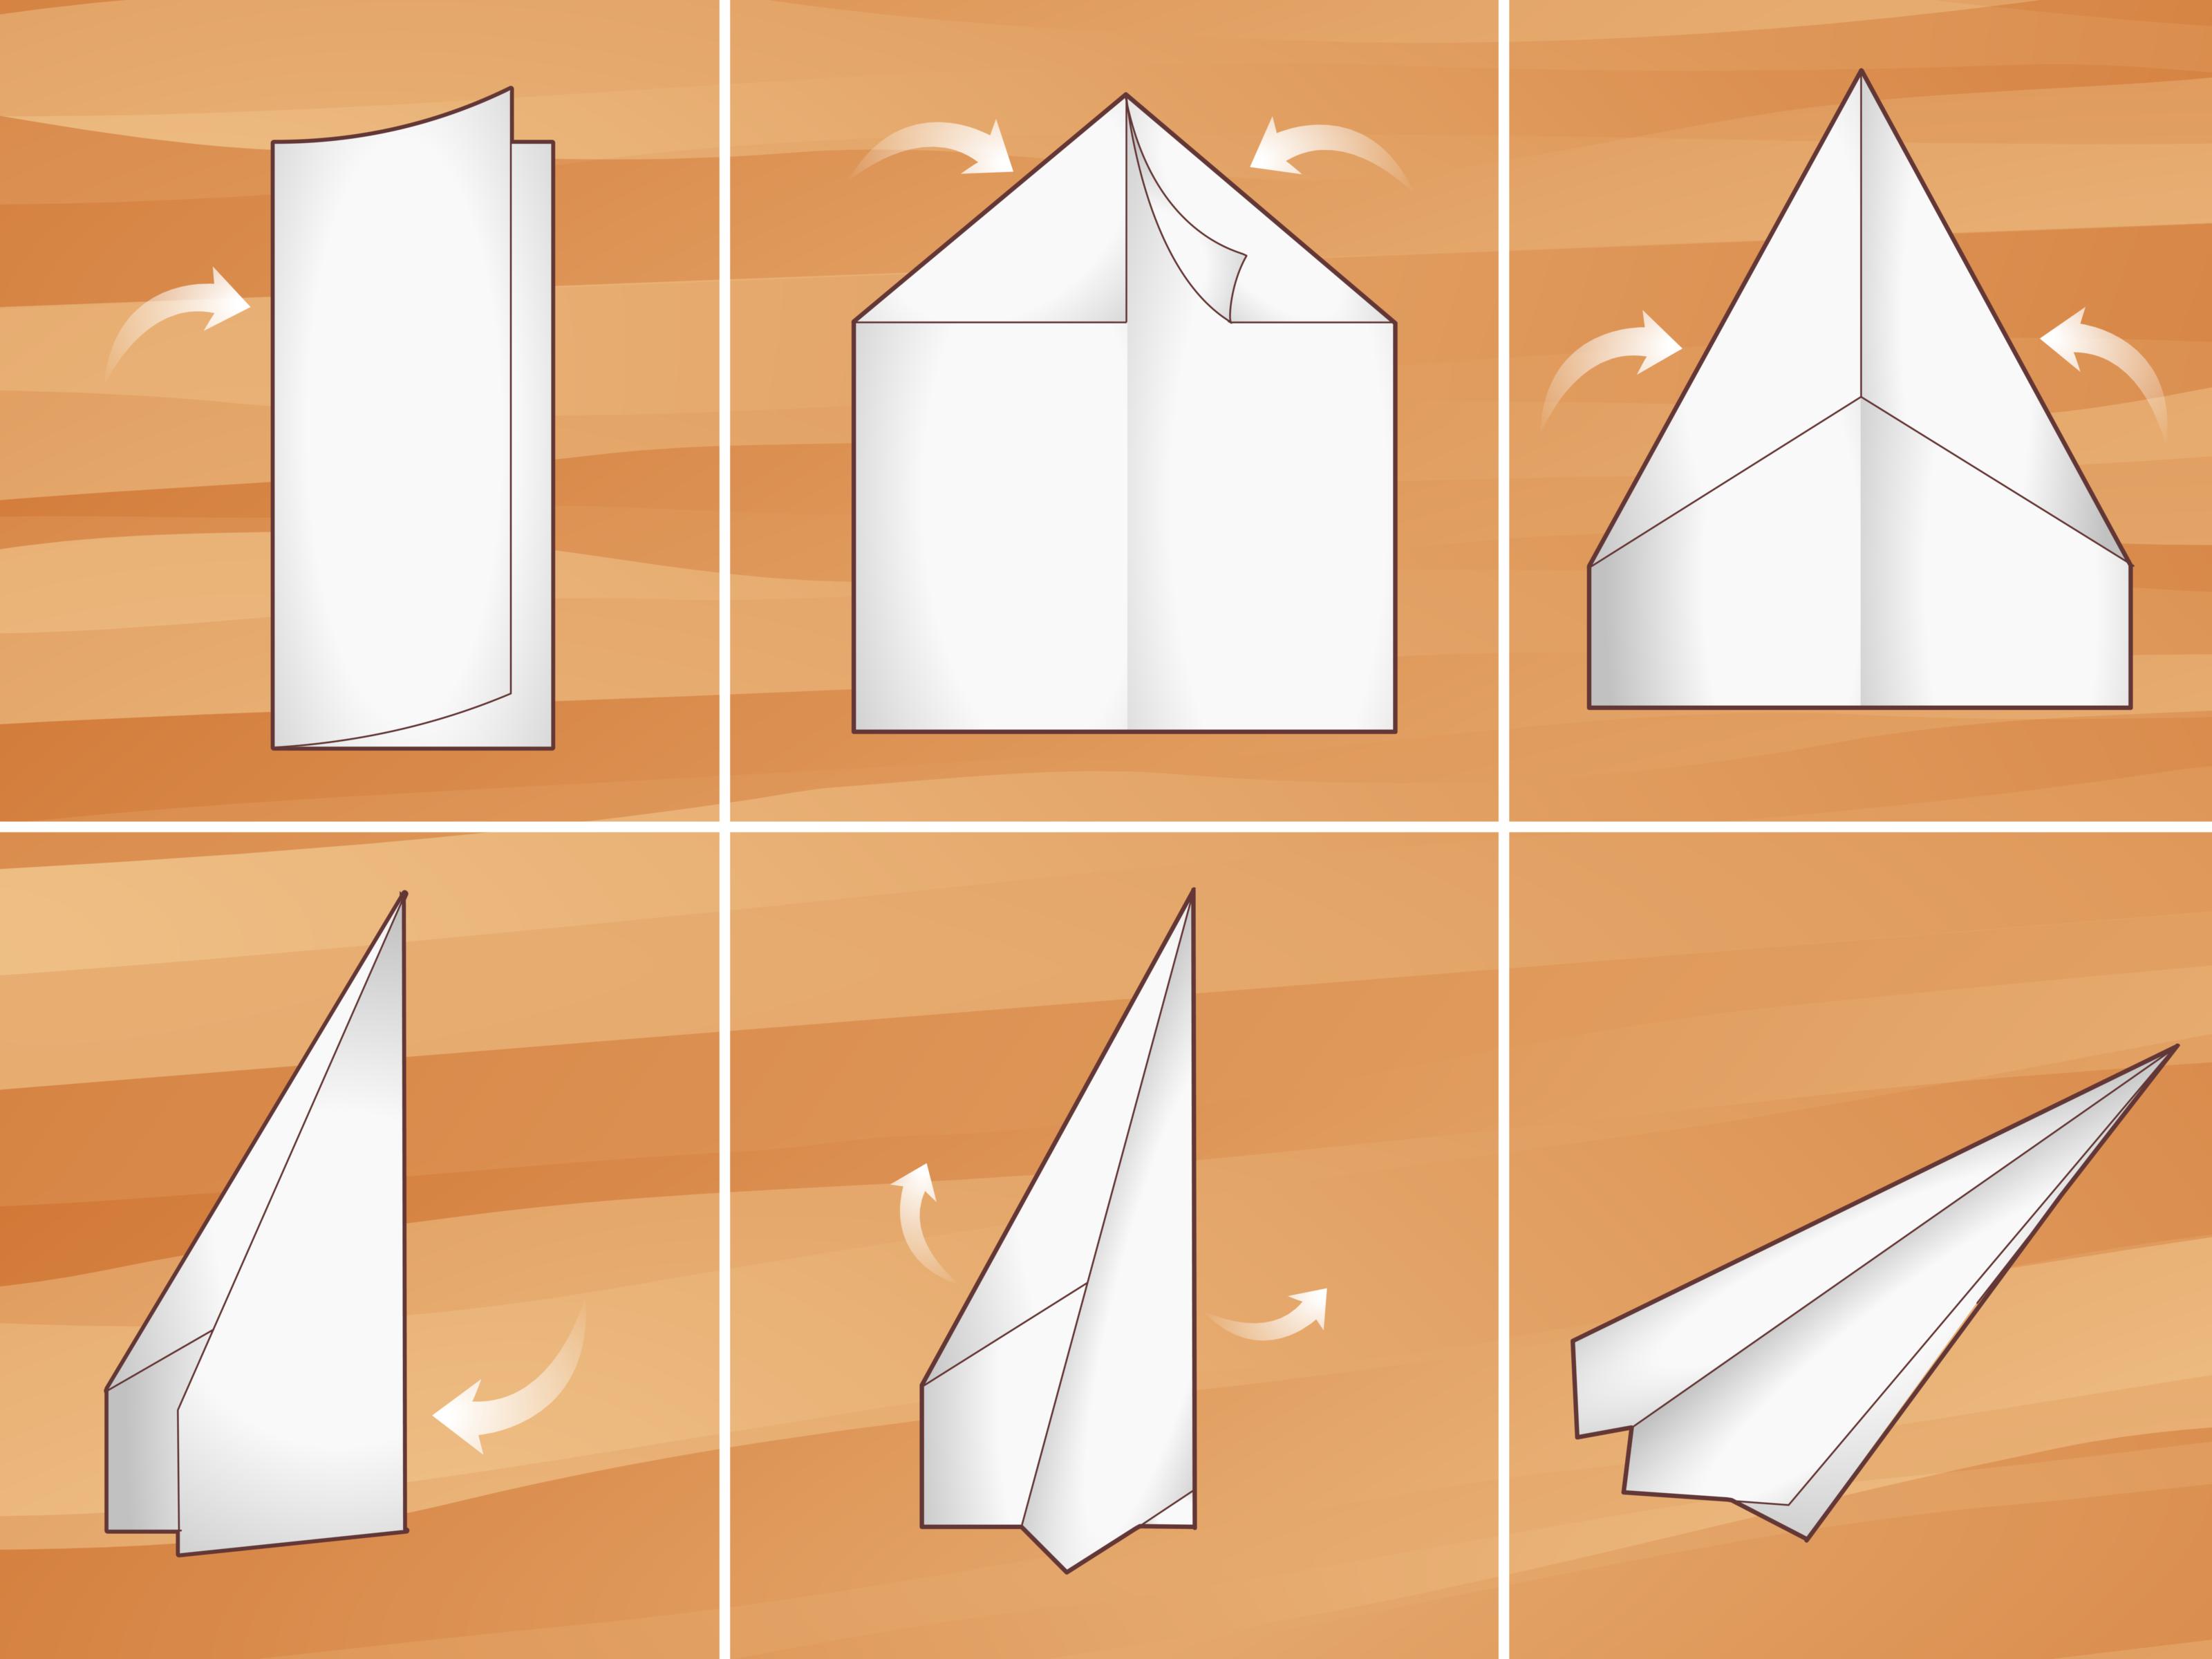
- Forme a Ponta Inicial: Take the top two corners and fold them inward so their edges meet precisely along the center crease. Press down firmly to create sharp folds. You want a clean, pointed top.
- Afinando o Nariz: Now, fold the newly created top edges inward again, making them meet at the center crease. This makes the nose of your plane narrower and more aerodynamic. This double fold adds weight and rigidity to the nose, helping it cut through the air.
- Dobre ao Meio: Fold the entire plane in half along your original center crease, with all the folded corners tucked inside. This forms the main body of your plane. Ensure all previous folds are sharp and aligned.
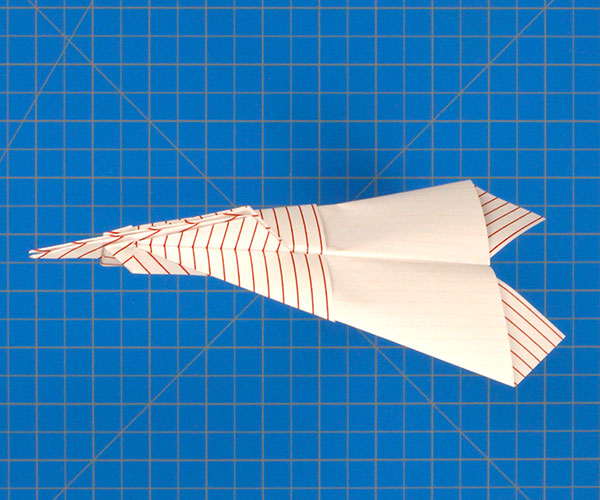
- Defina as Asas: With the folded side up, fold down one wing. The fold line for the wing should start from the nose and extend towards the back, aligning with the bottom edge of the plane’s body. Repeat on the other side, making sure both wings are mirror images of each other. Symmetry here is paramount for balanced lift.
- Finalize as Asas e Elevadores: For better flight, you can bend the back edges of the wings, often called elevators, up very slightly, maybe 1/8 to 1/4 inch. This small upward bend helps create lift and improves stability. For a classic, reliable design for speed and distance, this Basic Dart paper airplane is hard to beat.
CHECKLIST DE SUCESSO
- Is your plane perfectly symmetrical from nose to tail? Unevenness leads to veering.
- Are all your creases sharp and distinct? Loose folds mean unstable flight.
- Does the plane feel balanced when you hold it by the body? No heavy side or lopsided wings.
- Are the wings relatively flat or with a slight upward angle (dihedral) and the small elevators bent up? This indicates readiness for lift.
RESOLUÇÃO DE PROBLEMAS (TROUBLESHOOTING)
A verdade é esta: Even with the best instructions, sometimes planes don’t fly perfectly right away. If your plane consistently veers to one side, examine the back edges of your wings. Small, precise adjustments to these elevators can correct the flight path. Bending the trailing edge up slightly on the side it’s veering away from can often fix it. Imagine! If it consistently nosedives, bend the elevators up a bit more for increased lift. If it stalls and falls flat, your wings might need a slightly steeper angle upwards, or your throw might be too soft. For detailed tips on paper airplane steering, fine-tuning those wing adjustments is key.
How to Fold the Classic “Basic Dart” Paper Airplane
The Basic Dart is your entry point to high-performance paper aviation. Its straightforward design belies its incredible flight capabilities. Focus on sharp, even folds, and you’ll master this classic in no time. It’s a fantastic starting point for understanding aerodynamic principles with minimal effort.
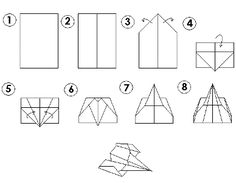
Step-by-Step Folding Instructions
Precision is your best friend. Each step, from the initial center crease to the final wing folds, contributes to the plane’s stability and range. Don’t rush. Take your time to align edges perfectly and flatten creases with your thumbnail. This attention to detail will pay dividends in flight performance.
Troubleshooting and Advanced Folding Tips
Beyond basic adjustments, consider the paper itself. Thicker paper can add stability but also weight. Experiment with different paper types. For advanced tips, explore how slight changes to the wing’s angle of attack (how much it’s tilted up when flying) can dramatically impact lift and glide time. It’s all about subtle tweaks.
Achieving Optimal Flight: Steering and Lift
Optimal flight isn’t just about throwing hard. It’s about a smooth, consistent launch. Hold the plane gently by its body, beneath the wings, and give it a firm, level push forward. Remember, those small bends in the elevators at the back of the wings are your primary steering mechanism. Bending them up increases lift, while bending them down can cause a nosedive. Think of them as your plane’s rudders and elevators working in tandem. Mastering these adjustments is the key to a controlled, long-distance flight.
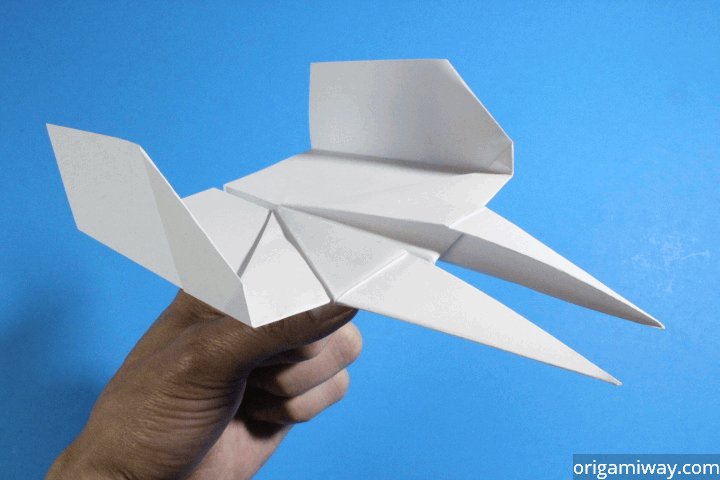
Exploring High-Performance Paper Airplane Designs
Once you’ve mastered the Basic Dart, a whole universe of designs awaits. From gliders that soar to jets built for speed, the principles remain the same: symmetry, sharp folds, and understanding how air interacts with your design. There are countless variations that offer different flight characteristics. To dive deeper into more complex and best paper airplane designs for distance, explore specialized resources.
Resources for Paper Airplane Enthusiasts
The journey into paper aviation is continuous. Websites, books, and even online communities are dedicated to the art and science of paper airplanes. Engage with other enthusiasts, share your designs, and learn new techniques. The more you experiment, the more you’ll understand the nuances of flight and the secrets to making a paper airplane that flies far. Keep folding, keep flying!
Extra Tips
- Experiment with paper weight: Lighter paper often glides better, while slightly heavier stock can offer more stability for advanced designs.
- Precision is key: Crisp folds make a huge difference. Use a ruler or your fingernail to get sharp creases.
- Symmetry matters: Ensure both sides of your airplane are as identical as possible. Imbalances will cause it to veer off course.
- Adjust the elevators: Small upward bends on the trailing edge of the wings can add lift. Tiny adjustments can drastically change flight.
Frequently Asked Questions
Why does my paper airplane always turn left?
This usually indicates an asymmetry in your folds. Double-check that your wings are even and that there are no unintended bends or creases on one side. Adjusting the trailing edge of the wings, often called elevators, can help correct veering. For more complex issues, exploring troubleshooting your paper airplane might be necessary.
What’s the best paper for making a paper airplane that flies far?
Standard 8.5 x 11-inch or A4 copy paper is a great starting point for most designs, especially the classic dart. For optimal distance, consider the paper’s weight. Lighter paper can glide further, but too light might lack stability. Experimentation is key!
How do I make my paper airplane go higher?
To increase altitude, focus on creating more lift. Ensure your wings have a slight upward angle (dihedral). Bending the back edges of the wings (elevators) slightly upward can also help the plane climb. A well-balanced design from our best paper airplane designs for distance can also contribute to better performance.
Conclusion
You’ve now got the tools to elevate your paper airplane game. Remember, practice and attention to detail are your best allies. Don’t be afraid to dive deeper into advanced paper airplane designs or perfect your technique with mastering paper airplane flight: tips for distance and accuracy. Happy flying!